Pages

Showing posts with label Tutorial. Show all posts

Tuesday, March 13, 2012

How to make a felted egg...


I made a felted egg the other night, and now I'm loving wet felting.  It's not hard to do, and it's so much fun to see something take shape so quickly.  So far I've made 5, one more and the kids will have a half dozen eggs in a carton to play with - a fun toy !  Then I'll have to make some more because I need some for my easter decorations...ho hum....!


If you want to make some too, this is how I did it.  I bought some little foam eggs from Lincraft to use as my mould.  Then I used 11 grams of wool fleece.  I decided to weigh the fleece after my first 2 eggs came out very different in size...the rest are sort of similar !


First, wrap your egg in fleece, firmly, but not tightly.

...i know, looks nothing like an egg hey !


 Carefully wet your egg with hot water, either under the tap or in a bowl, whatever works for you.  Make sure all of the wool gets wet. 

Then add a few drops of dish soap.


And start very gently patting your wool down to the point where it looks like it's all holding together.

Wet it or add more soap if you think it needs it - too much soap will easily wash out! so don't worry.


Then as the wool felts more, start to rub your egg more vigorously and roll it around in your hands firmly.  Roll it both horizontally and vertically to ensure even shrinkage.  I was amazed at how quickly you can see a change in the shape and form of all that wool fleece! It's pretty cool !

When it looks like it's done, rinse it under cold water to remove all the soap.


And here's my finished egg - a lot smaller than when I started  - it should shrink by about 1/3, and the whole process took me only about 10-15 minutes.

This would also be a great activity to do with your kids !


Tuesday, February 21, 2012

Tutorial: Flower Girl Bendy Dolls


A couple of weeks ago, I bought a bag full of embroidery thread from the op shop.  In the bag, there were 3 artificial flowers with no stems.  So I decided to have a go at making some flower girl dolls.  And I'm really pleased with how they turned out, so sweet, Miss Autumn and Miss Spring.  The other flower is a green one, maybe Miss Summer?


To make a doll, you'll need a flower, with the stem removed, a bendy doll - small size, about 10cm high, a piece of wool felt, some wool roving for the hair, and some thread.


First job is to give her some stockings, not totally necessary, but guarantee, someone will look under her skirt,   and it's nice for her to have pretty legs!!  So bend one leg out of the way, and put a little bit of glue on one leg, smear it around to cover all sides.


Start with the end of the thread around mid leg, then take it to the bottom and start winding UP the leg, covering the end of that thread.  When you get to the top, just glue the end down.


Repeat with the other leg.


Now take your flower and remove the middle piece.  The back and front should easily pull apart.


Note that you have a few layers of small petals and a few layers of larger petals.  Remove the small petals and put them aside for now.  They will become her hat.


Cut across the middle of the flower, just big enough to fit around the dolls waist, about an inch.


Now put the her feet through the hole you just cut, one at a time.  It will be a tight fit, but it WILL fit! Then pull it up over her waist.  You can glue it if you like, but if it is a tight fit, it won't be going anywhere.


Now for her top.  I cut this very basic pattern.  The side bits are the sleeves, so adjust them according to the length you want.  For a summer doll I would probably go sleeveless.


Cut a slit down through the centre just big enough to fit over her head, about an inch long.  And embellish her top to your liking.


Now place the top over her head and sew the bottoms of the sleeves together.  You can also sew the sides of the top together, I chose not to.


For her hair...Glue your piece of wool roving onto her head.


Now take those smaller petals that you set aside earlier... sew a small piece of felt over the middle to hide the hole....and sew the little flower with a couple of stitches to her hair for a hat.


And there you have it, a pretty little flower girl !


Big kisses for this flower girl from Marlise!!

Monday, February 13, 2012

This is how I make yoghurt...

Do you make your own yoghurt?  Have you ever tried? 

Yoghurt is a wonderful, healthy food and is so easy to make at home.  It's also much cheaper to make your own, and you can add whatever fruit you have to flavour it.

this is what I do.....
Measure out 1L of pasteurized milk. 


Then measure 1 Tablespoon of natural yoghurt for your starter.  Make sure it is a natural yoghurt and that it contains LIVE cultures.  I use Jalna yoghurt, either the biodynamic organic yoghurt, or sometimes I get the Jalna Greek Style natural Yoghurt - just because I can buy it in a smaller tub.  The ingredients list includes lactobacillus acidophilus, bifidobacterium, lactobacillus casei - these are your LIVE cultures.  It's important to use a yoghurt starter with LIVE cultures because they will innoculate your milk and help to turn it into yoghurt.


I use a 1 litre thermos to incubate my yoghurt, make sure it's had a good clean!


Once I have everything ready, I heat up the milk.  I don't use a thermometer, I just bring the milk almost to the boil, you can tell it's there when it's steaming and starts to froth a little around the edges.
I take it off the heat, and  pour it into my pyrex jug to cool down to the point where I can comfortably put  my clean  finger in and leave it there...luke warm isn't warm enough, it has to be quite warm!


When the milk is ready, I put the spoonful of yoghurt into the thermos, then  pour in a little milk and give it a good stir.  Pour in the rest of the milk, give it another good stir  and close the lid.


The yoghurt 'doesn't like to be disturbed, so I put the thermos in a corner of the kitchen and leave it at least 8 hours but no more than 24hours.


The result, yummy fresh yoghurt.  Bear in mind that homemade yoghurt isn't as thick as the stuff you buy.  My yoghurt is generally quite pourable, and sometimes thin enough to be drinkable - but  I like it like that !

You can thicken your yoghurt naturally by straining it through a muslin bag.  This removes the whey from the yoghurt, leaving a nice thick consistancy.  You can strain it anywhere from a few hours to a few days - up to you how thick you want it to be (keep in the fridge while it's straining).  Once all the whey has drained out, you'll have whats called  'yoghurt cheese'.  Yoghurt cheese is great as a spread or a dip.  Just add some herbs and any other flavour you like, or, for a really decadent treat, try these yoghurt maple balls, they are so good!

Homemade yoghurt can also be quite tart tasting.  If you're after a sweeter version, adding pureed fruit is delicious.  Or try a bit of maple syrup and cinnamon mixed into the yoghurt
too  ...mmmmmm...   I'm feeling like some right now !!

Friday, January 27, 2012

homemade deodorant...


Ahhhh...deodorant.  It's one of those things you just have to use.  Well in this climate you do.  I live on the Centeral Queensland Coast of Australia.  It's hot and it's very humid here, especially now with all the wet weather we've had.   You wake up in the morning and you're feeling sticky.  So you get up and have a cold shower, get dressed, and 10 minutes later, you're feeling sticky again.  Gotta love it though!  This is a beautiful part of the world. 

I'm not a heavy sweater, thank goodness, and for the last year or so, I haven't worn any deodorant (aaaahhh!!!!!!!!  it's OK, i do shower every day !! ).  Reason being,

1.  I refuse to buy a commercial deodorant that contains too many ingredients that I can't pronounce,

2. My 'natural' crystal deodorant shattered, and I just never got around to buying another one, coz I figured it would shatter too.  And it hurts trying to rub fragments of shattered crystal on your arm pits - really, it does !!

3.  I was too tight to spend money on a chemical free - green - type deodorant from the health shop, becuase I knew deep down that I could find a recipe and make one myself.  I'm a bit like that. 

So....I finally got around to making one.  Last year actually.  Around about October, so I've been testing it for almost 4 months now during the hottest and most humid part of the year,  And the verdict - I'm very happy.  It's easy  to make, cheap to make, easy to use, and I can pronounce the names of all the ingredients - that's the BEST part!  OK, so lets get down to it.

There are lots of different recipes out there but the one I liked and tried was this one from the Angry Chicken blog.  Why?   I had all the ingredients, and I love shea butter and cocoa butter on my skin because they feel so luxurious.  Yes, even under my arms that matters.

(Please note that I have changed the recipe a bit, so check the above blog for the original recipe.  I chose to omit the Vit E, and essential oil, and I added some glycerin.)


The recipe:

2 Tblsp Cocoa Butter
3 Tblsp Shea Butter
3 Tblsp Baking Soda
2 Tblsp Cornflour
1 tsp glycerin (optional)


Melt the cocoa butter in a double boiler, or a set up similar to what I did here.

When it's melted take it off the heat and add your shea butter.  Stir it in to melt.

Note:  Shea butter may become grainy if heated for too long.  That's what happened to the batch I made for christmas presents, but I didn't know that then!!


Now add your baking soda, cornflour and a teaspoon of glycerin. 

Sift the baking soda if it has lumps.  Trust me, it will make your life so much easier! 

And don't be afraid to enlist the help of a little 'stirrer'.  She will love you for it.


Let her stir until is is completely smooth.


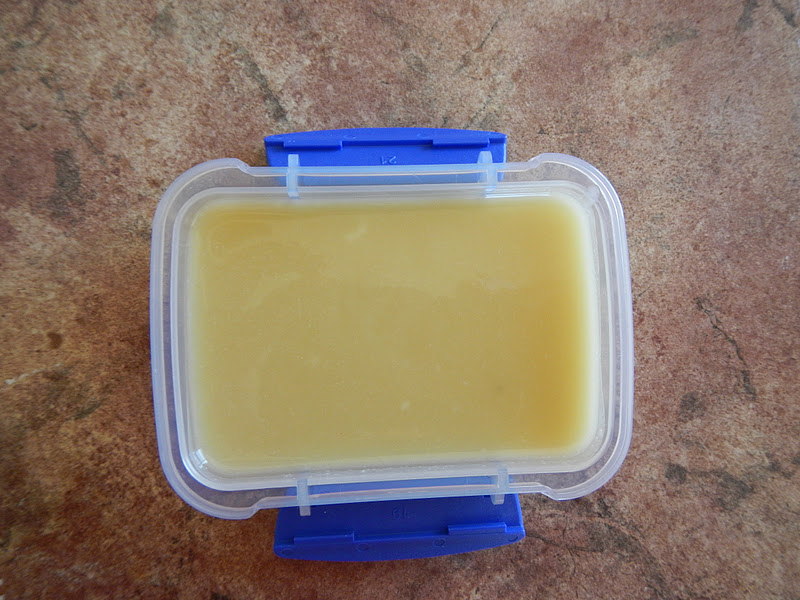
Then pour it into a small container, and put it into the fridge to set.  I keep mine in the bathroom for convenience, but you can keep it in the fridge if you prefer.


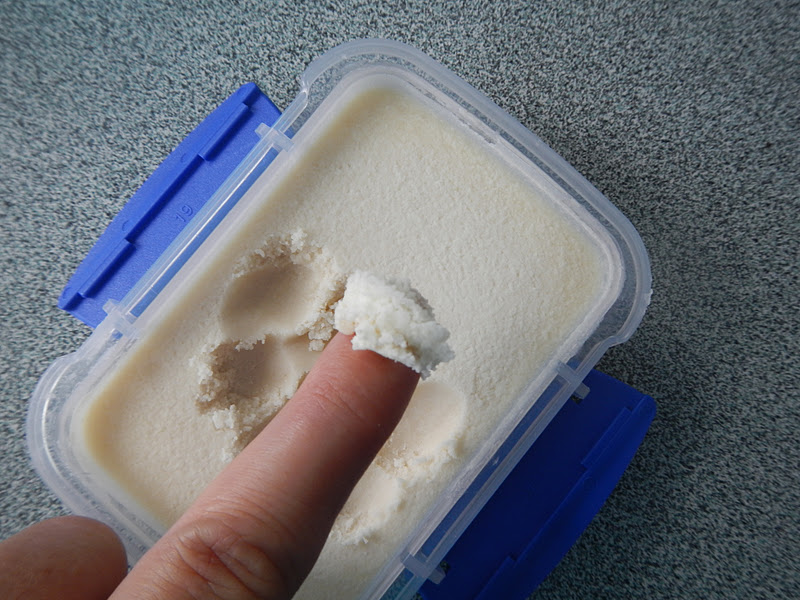
To use it, I just scrape a pea size piece out with the back of my finger...


And rub it a bit between my fingers to soften it.  When it gets creamy like this, smear a thin layer under your arms.  Easy !


I don't particularly like 'smelly' things in my homemade skin care products, so I choose not to use essential oils.  I like my stuff fragrance free, but that's just me.  Feel free to add whatever essential oils you like to this recipe.  TeaTree, Lavender, Rosemary and Eucalyptus all have anti- bacterial qualities and are great for odour protection.  Oils of orange and ylang ylang are also a nice combination to use.

I used glycerin in this recipe, simply because the first batch I made was quite hard, and took a bit of effort to soften it.  Using the glycerin makes it much softer and easier to use.

You can also add Vitamin E to your deodorant.  Vit E is a powerful anti-oxidant.  Great for your skin, and also great in homemade preparations as it increases shelf life by slowing the oxidation of any oils you might be using, so they don't go rancid.


OK,. so that done, bear in mind that this is a DEODORANT, not an ANTIPERSPIRANT.  Big difference.  An antiperspirant stops you from sweating, which is not necessarily a good thing.  Antiperspirants contain aluminium salts which clog your pores, thereby stopping you from sweating.  Sweating is a natural process that allows your body to cool itself when it gets too hot.
The aluminium can accummulate in your body and your brain.  Are the alarm bells ringing yet??  AND aluminium accumulation has been linked to Alzheimers Disease and Breast Cancer.  Now, although the evidence for these things may be inconclusive, would you risk it?  Really, would you?

OK, enough of the scary stuff, I was talking about deodorants and antipersiperants.  A deodorant won't stop you from sweating, however it will stop you from smelling stinky, and that's what I'm talking about !!  Deodorants neutralize odour, if you want the more proper term !

Another interesting point to consider - the more toxins you consume in your diet - I'm talking junk food, processed foods etc - the more stinkier your stink will be than if you eat a clean diet consisting of more whole foods, fruits and veges etc.

I hope you give this a try at home, it really is an easy step towards 'greening' your bathroom.  I guess the hardest part will be sourcing the shea and cocoa butters.  Here in Australia,  I buy most of my ingredients from Escentials of Australia in Noosa, QLD, they have pretty much everything you could possibly need to make your own skin care products, and more.   You can also try your local health store, they may sell some raw ingredients in small packets.
I'll be posting more skin care recipes this year, so you'll have the opportunity to use up your ingredients.


Tuesday, December 13, 2011

how to make a sled for your stick reindeer


This little reindeer is ready to get to work!  He has a sled to pull, and a bright red nose to light the way...

See my previous post for instructions on how to make this cute little stick reindeer, and then read on to learn how to make the sled.


From your collection of sticks, cut 4 pieces which will be the length of your sled - you determine the size depending on the size of your reindeer. 
Then cut 2 pieces a bit shorter, and 2 pieces a bit longer.


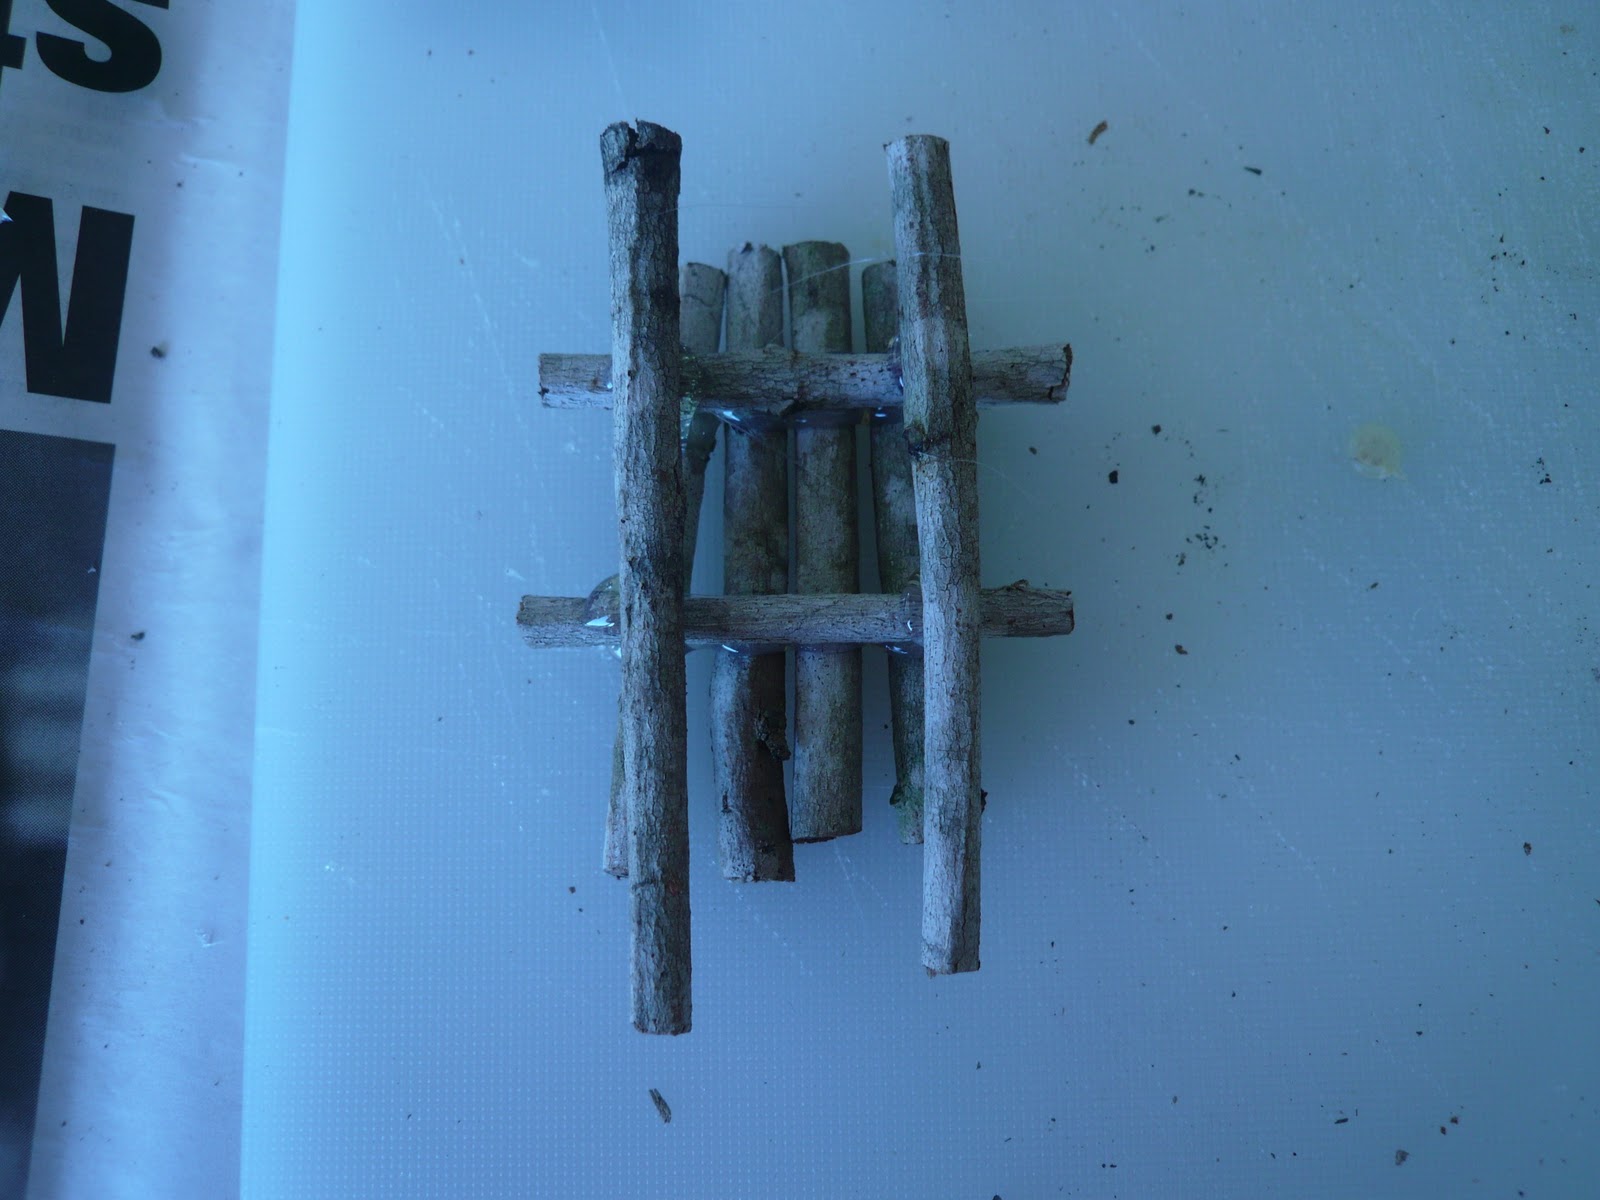
Put a strip of hot glue along the length of the shortest sticks and glue them on top of the 4 like this, to hold them together.


Now glue your longest 2 sticks on top.


When the glue has set, turn it over, and you have a sled.


I glued a piece of ribbon around my reindeers neck and onto the sled, so it was all attached.


Here's one I finshed the other day to give away as a little Christmas gift, with a chocolate glued to his sled, this was one happy little reindeer !

To make it easier when I gave him away, I glued the reindeer and sled to a small piece of cardboard. 

Make lots of reindeer this Christmas !! 


Sunday, December 11, 2011

how to make a stick reindeer...


Isn't this the cutest little reindeer ??  I think it's a perfect little decoration for Christmas time...here's how you can make one too...


First, go for a walk to the park and collect a few sticks.  The biggest stick I collected was about 1-1.5cm in diameter for the body of the reindeer.  The smallest was the thin end of the stick where it branches out a little - those bits are your antlers.


The only equipment you'll need is something sharp to cut your sticks, and a hot glue gun.


Next step is to cut your sticks.  I always start with the body piece first, then cut the other pieces with sizes relative to the body - it's easier than you think !  The body piece for this reindeer is about 1cm in diameter and about 3 cm long.  You can make your reindeer any size you want.

Lay the pieces out like the above picture as you go ...so you will need a body, 4 legs, a head, neck, tail and 2 antlers.  Notice the diagonal cut on the front of the head - to accentuate the nose.


Ok, let's go...!  Put 2 blobs of hot glue on the bottom of the body piece...


and attach 2 legs.


Bare in mind that although the glue will set quite quickly, if you realize you've stuck something in the wrong place, you can easily peel the glue off and re-do it.


Do the same to attach the other 2 legs.


Then stand up your reindeer to check that the legs are even.  If not, peel off the 'dicky' leg and reset it!
 That's the hardest part - getting the legs even, but it's really not hard at all !


Now glue on the head and neck.  Make sure the neck is standing straight up - otherwise your reindeer might over balance when you glue the head on.

Keep the long end of the nose on the top side...


Finally add the antlers and the tail and voila! one cute little reindeer!!


Check back tomorrow for a post on how to make a sled for your reindeer, and a neat gift idea.

Have a wonderful day!