Pages

Showing posts with label nourish your skin. Show all posts

Monday, March 12, 2012

Gift Bags...


The Relief Society Organisation is celebrating it's 170th anniversary this year. 

In commemoration of this event, the local women of the Church of Jesus Christ of Latter Day Saints are having a small get together and asked me to make up some gift bags for the ladies.


So here's what I prepared....some homemade soap and a nourishing face cream.  I hope they like it !


All packed up and ready to go...

Wednesday, February 22, 2012

lotion bar recipe...


Lotion bars...so luxurious.


The recipe, so simple.


All you need is equal parts of:

Beeswax

Shea Butter

Coconut Oil

and add to that your choice of essential oils

(If I use 60 g of each ingredient, I add about 1tsp of essential oils.)


I used this 'Tiare' infused coconut oil.  I love the smell of this flower so much that I named one of my daughters Tiare!


You could also use Sweet Almond Oil or another oil instead of coconut  if you want to...remember this is YOUR lotion bar !


The method, is also simple:


Melt the beeswax

(I use a pyrex jug and put it straight into a pot of hot water)

Then add the shea butter and coconut oil.

(Shea butter doesn't  like to be heated for too long, it might get grainy when it cools.)


Take off the heat and let it cool for a couple of minutes.


If using essential oils, add them now, and stir well.


Then pour it all into your molds.


I use cupcake molds and if I use about 60g of each ingredient, I get 2 nice sized lotion bars.


They will set in no time at all, but if you want to speed up the process, just put them in the fridge.


Bear in mind, that your recipe may need to change with the seasons...when it's cooler you might need to add more coconut oil to make a softer bar.


Play with it and see what works for you, you can always re-melt it if it's not quite right.


In our tropical climate this recipe is perfect for summer, it glides on beautifully.


Storing your lotion bars


I had been storing my lotion bars in paper cupcake cases - it worked for me!
Then I read somewhere (can't remember where) that a lady stores her lotion bars in giant tea bags - what is a giant tea bag??

  Anyway, that got me thinking...  I have a roll of biodegradeble nappy liners in the cupboard that I never really used.  They are made of a papery, tea-baggy kind of material and it's quite strong...


so I pulled out the sewing maching and sewed a couple of little bags, just big enough for 1 lotion bar. 


...look at that, a perfect fit.


But don't just take my word for it...there are lots of other lotion bar recipes out there, have a look here, here and here for more ideas.


Friday, January 27, 2012

homemade deodorant...


Ahhhh...deodorant.  It's one of those things you just have to use.  Well in this climate you do.  I live on the Centeral Queensland Coast of Australia.  It's hot and it's very humid here, especially now with all the wet weather we've had.   You wake up in the morning and you're feeling sticky.  So you get up and have a cold shower, get dressed, and 10 minutes later, you're feeling sticky again.  Gotta love it though!  This is a beautiful part of the world. 

I'm not a heavy sweater, thank goodness, and for the last year or so, I haven't worn any deodorant (aaaahhh!!!!!!!!  it's OK, i do shower every day !! ).  Reason being,

1.  I refuse to buy a commercial deodorant that contains too many ingredients that I can't pronounce,

2. My 'natural' crystal deodorant shattered, and I just never got around to buying another one, coz I figured it would shatter too.  And it hurts trying to rub fragments of shattered crystal on your arm pits - really, it does !!

3.  I was too tight to spend money on a chemical free - green - type deodorant from the health shop, becuase I knew deep down that I could find a recipe and make one myself.  I'm a bit like that. 

So....I finally got around to making one.  Last year actually.  Around about October, so I've been testing it for almost 4 months now during the hottest and most humid part of the year,  And the verdict - I'm very happy.  It's easy  to make, cheap to make, easy to use, and I can pronounce the names of all the ingredients - that's the BEST part!  OK, so lets get down to it.

There are lots of different recipes out there but the one I liked and tried was this one from the Angry Chicken blog.  Why?   I had all the ingredients, and I love shea butter and cocoa butter on my skin because they feel so luxurious.  Yes, even under my arms that matters.

(Please note that I have changed the recipe a bit, so check the above blog for the original recipe.  I chose to omit the Vit E, and essential oil, and I added some glycerin.)


The recipe:

2 Tblsp Cocoa Butter
3 Tblsp Shea Butter
3 Tblsp Baking Soda
2 Tblsp Cornflour
1 tsp glycerin (optional)


Melt the cocoa butter in a double boiler, or a set up similar to what I did here.

When it's melted take it off the heat and add your shea butter.  Stir it in to melt.

Note:  Shea butter may become grainy if heated for too long.  That's what happened to the batch I made for christmas presents, but I didn't know that then!!


Now add your baking soda, cornflour and a teaspoon of glycerin. 

Sift the baking soda if it has lumps.  Trust me, it will make your life so much easier! 

And don't be afraid to enlist the help of a little 'stirrer'.  She will love you for it.


Let her stir until is is completely smooth.


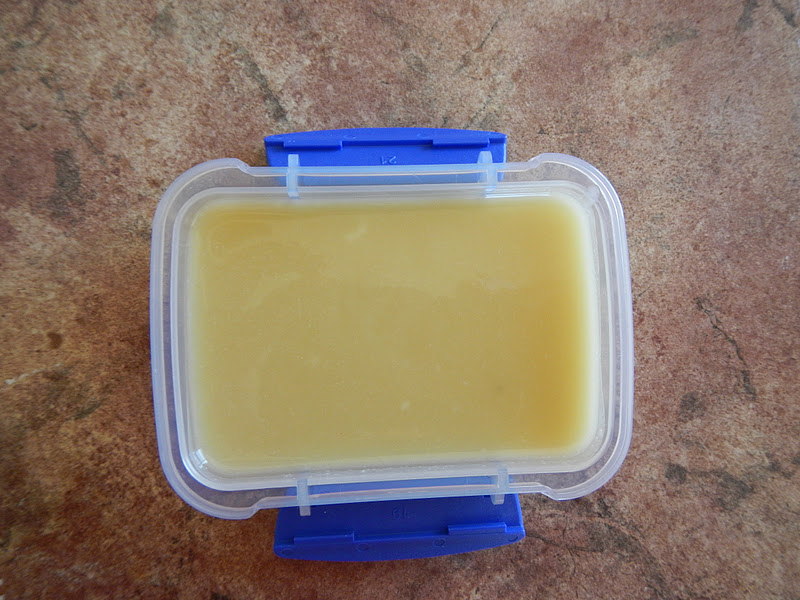
Then pour it into a small container, and put it into the fridge to set.  I keep mine in the bathroom for convenience, but you can keep it in the fridge if you prefer.


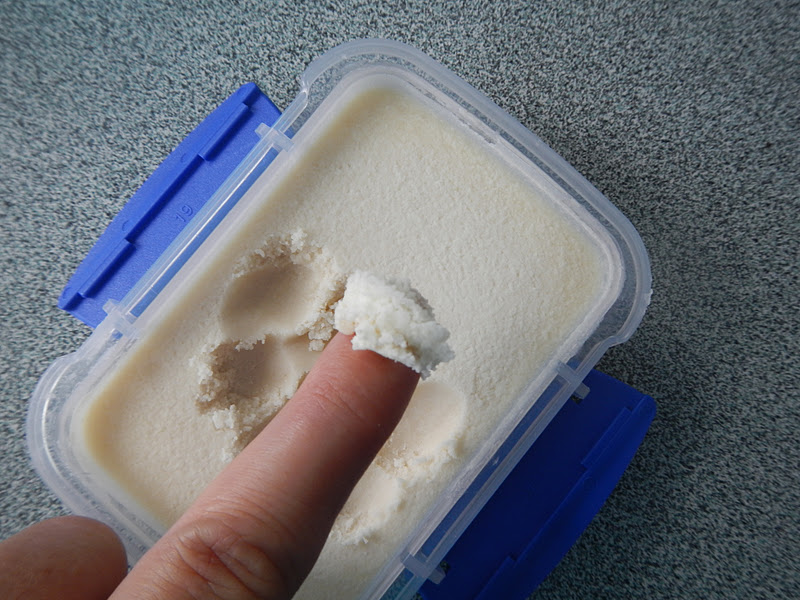
To use it, I just scrape a pea size piece out with the back of my finger...


And rub it a bit between my fingers to soften it.  When it gets creamy like this, smear a thin layer under your arms.  Easy !


I don't particularly like 'smelly' things in my homemade skin care products, so I choose not to use essential oils.  I like my stuff fragrance free, but that's just me.  Feel free to add whatever essential oils you like to this recipe.  TeaTree, Lavender, Rosemary and Eucalyptus all have anti- bacterial qualities and are great for odour protection.  Oils of orange and ylang ylang are also a nice combination to use.

I used glycerin in this recipe, simply because the first batch I made was quite hard, and took a bit of effort to soften it.  Using the glycerin makes it much softer and easier to use.

You can also add Vitamin E to your deodorant.  Vit E is a powerful anti-oxidant.  Great for your skin, and also great in homemade preparations as it increases shelf life by slowing the oxidation of any oils you might be using, so they don't go rancid.


OK,. so that done, bear in mind that this is a DEODORANT, not an ANTIPERSPIRANT.  Big difference.  An antiperspirant stops you from sweating, which is not necessarily a good thing.  Antiperspirants contain aluminium salts which clog your pores, thereby stopping you from sweating.  Sweating is a natural process that allows your body to cool itself when it gets too hot.
The aluminium can accummulate in your body and your brain.  Are the alarm bells ringing yet??  AND aluminium accumulation has been linked to Alzheimers Disease and Breast Cancer.  Now, although the evidence for these things may be inconclusive, would you risk it?  Really, would you?

OK, enough of the scary stuff, I was talking about deodorants and antipersiperants.  A deodorant won't stop you from sweating, however it will stop you from smelling stinky, and that's what I'm talking about !!  Deodorants neutralize odour, if you want the more proper term !

Another interesting point to consider - the more toxins you consume in your diet - I'm talking junk food, processed foods etc - the more stinkier your stink will be than if you eat a clean diet consisting of more whole foods, fruits and veges etc.

I hope you give this a try at home, it really is an easy step towards 'greening' your bathroom.  I guess the hardest part will be sourcing the shea and cocoa butters.  Here in Australia,  I buy most of my ingredients from Escentials of Australia in Noosa, QLD, they have pretty much everything you could possibly need to make your own skin care products, and more.   You can also try your local health store, they may sell some raw ingredients in small packets.
I'll be posting more skin care recipes this year, so you'll have the opportunity to use up your ingredients.


Wednesday, November 9, 2011

No Poo...

I haven't poo'd for 6 weeks now and I feel great ! 

Now don't get me wrong - no poo is a good thing.  It's actually short for 'No Shampoo'.   oooh !!!  I hear you say with a great sigh of relief.  Thanks good ness for that.  but why?  Why would you not use shampoo, isn't that gross?  Well to be perfectly honest, I had never heard of no poo until 6 weeks and a few days ago.  I stumbled across it completely by accident and somehow it all made sense to me.  I mean, I already knew that shampoo was full of yucky chemicals, but there was no other worthwhile option for me. 

I bought some goats milk soap at the markets - twice - and both times the person selling it to me said "You can even wash your hair with it.  It will make your hair lovely and soft."  Now believe me, I checked out their hair - both people, both times and yes their hair did look lovely and soft, and shiney too.  So I went home, both times and washed my hair with the soap.  First wash was great, felt nice, hair even looked nice afterwards.  Then I washed it a second time and it was horrible - my hair I mean.  Back to shampoo for me.  And then I discovered the whole no poo thing.  And it's a BIG thing - google it and see just how many people around the world don't poo !  It's amazing !  How could I have missed this important information for so long ? 

How to 'no poo'

Ok, let me explain it as best I can.  No poo means you don't wash your hair with shampoo, ever.  Yep. That's right.  EVER.  Instead you rinse your scalp with bicarb soda and water.  The general consensus seems to be 1 Tablespoon of Bicarb mixed with 1 cup of water.  First wet your hair, then  pour the bicarb and water over your head and massage it around your scalp.  Rinse well with water.   Next, mix 1 Tablespoon of Apple cider Vinegar with 1 cup of water, and pour that over the ENDS of your hair - not your scalp.  After doing that you can actually feel how it has softened your hair.  At this point, I can easily comb through my hair, rinse the vinegar out and that's it !  My hair doesn't smell like vinegar, well at least I can't smell it, and nobody has said anything !!   I usually do this routine, every 3 days or so. 

How does it work?

Well, how can it not....seriously, did they even HAVE shampoo a hundred years ago?  Your scalp naturally produces oils - that's a good thing.  BUT, we strip those oils away when we use shampoo.  Shampoos contain chemicals,  harsh detergents like sodium laurel sulphates and sodium laureth suplhates - NOT GOOD.   They rid your hair of natural oils - that's what detergent does right ?  And then your body panics coz there are no oils left, and it produces more - to protect your hair and scalp...and then you strip it away again - it's a viscious circle, and  it's no wonder some people end up with oily hair - oil production has gone into overdrive to compensate the loss.  On the other hand, not having those natural oils, can leave your hair looking dry and dull - hello!  That's me !!

Then there is the lather factor.  We've all seen the ads on TV, beautiful girls shampooing their hair in all that luxurious white foam - I know !  I've been sucked in to that too !  More lather doesn't mean more clean though - sad but true.

So we can do without the chemicals, apparently !  And let our hair do it's thing - naturally.  C'mon !   Have faith in your hair !


What will my hair look like?

Well, don't expect wonders to happen over night.   Your hair will gradually be stripped of all the chemicals that are coating it, and that might come as a bit of a shock to your hair.  Then it will have to get used to being 'naked' in a sense.  In a nutshell, it's going to get worse before it gets better.   It can take up to 4 weeks for hair to 'transition'.  And the defintion of transition is pretty much yucky hair.  (The goats milk soap people forgot to tell me that bit, that's why I gave up !)  Now I said UP to 4 weeks, it took my hair about a week and a half to 'get over it'.  But hang in there - Endure to the end !!  It's a good opportunity to wear your hair up, with a headband, or a scarf maybe !! No seriously, mine didn't get THAT bad.  I wore a headband for a couple of days, but it was no big deal. 

And then ?

And then, congratulate yourself because you are NO LONGER bound to that shampoo bottle.  Your hair is likely to have more body, and less frizz - great news for curly tops like me.  For me, my hair has been easier to manage somehow - I don't use any other hair products, don't have to anymore.  And my curls have been more curly lately.  I still have bad hair days now and then, but not nearly as often as I used to.  And think of all the money I'll be saving - lots...aswell as less landfill...happy days !!

The end note...

I've also got my kids going no poo.  Ruby is 4 and has dead straight hair.  Her hair was dry and dull and I was using (an expensive) leave in conditioner in her hair to make it presentable.  Don't need it anymore though.  Her hair is so shiney and beautiful now !  And my baby, I've never used shampoo in her hair anyway, but I think the addition of porridge and fruit and whatever else she has eaten to her daily hair routine just adds extra bounce and shine!!


Thursday, October 20, 2011

keeping clean...

I made soap !!  I'm so excited about it too!  I've been wanting to make soap for years but always put it in the too hard basket.  Then a few months ago I bought the ingredients, but was still too scared of using the caustic soda to make the lye - necessary to make the soap.  aaaaaaahhhhhh!! Then I read this tutorial about making soap - sounded so easy, and I had the ingredients for her recipe.  So I kicked the family out of the house last Saturday - was still scared about using the lye, but I had safety goggles and gloves and lots of newspaper and...and..and I went ahead and did it !  WOW! what a feeling !  It was so much easier than I expected and not scary at all.  I mixed the caustic soda and water outside to avoid the fumes, and no time at all I was pouring the mixture into my mold.

24hrs later, I had soap - it worked !  I cut it up into bars and and have been turning it everyday to aid the drying process.  Give me 6 weeks and I'll be using my very own, luxurious soap.  Can't wait !


So here is my first batch of soap - in it's natural state - no colour or fragrance added


Look at it's beautiful smooth texture...just like a proud mummy I am !

ooh, and I also used this tutorial as a reference too.  Soap making looks like so much fun.  I'm gearing up to make some more already.


By the way, are you feeling crunchy ??
haha...what do YOU use to wash your face with?  I've used all sorts of things from the kitchen cupboard - or fridge -  like buttermilk and sour cream.  But now I'm using honey.  Why would you pay money for a cleanser with chemicals in it, when you can use something you already have at home - honey ! Honey has heaps of beneficial properties and you can find them  at
this blog and see if it works for you.  I've been washing my face with honey for a week now, and I'm loving it.  Try it for yourself and let me know what you think.